Getting Started
Maps
Your Account
Adding Data
Create a New Map
There are two ways to create a new map:
- If you have a paid subcription to Site Control, scroll down to see how you can create a map within your Site Control account.
- If you have a free LOVELAND account, you will find instructions for how to create your map below.
LOVELAND Account:
Your LOVELAND account comes with Site Control Starter, which allows you to create one map.
To get started, you will need to click on the “Make a New Map” button on your profile page.
Then, give your new map a name and specify a location for the map. The location can be a city, neighborhood, or zip code. As you type your map’s location, options will appear in a drop-down below the text bar. Select one of those options to be sure your location is in the correct format. If no options appear under the text bar, check your spelling and make sure that the area you chose is part of Loveland’s national cadastre (makeloveland.com/us).
Once you specify a name and location for your map, you have several options:
- Click “Go to My Map” to view the map you just created and to experiment with features like drawing a focus area.
- Click “Create a Survey” to go directly to Site Control’s survey builder to create a custom survey.
- Click “Import Data” to import your own data or to connect data from an open data portal.
- Click “Browse Public Data” to explore Site Control datasets that have been made public by other users.

Site Control Pro or Enterprise Account:
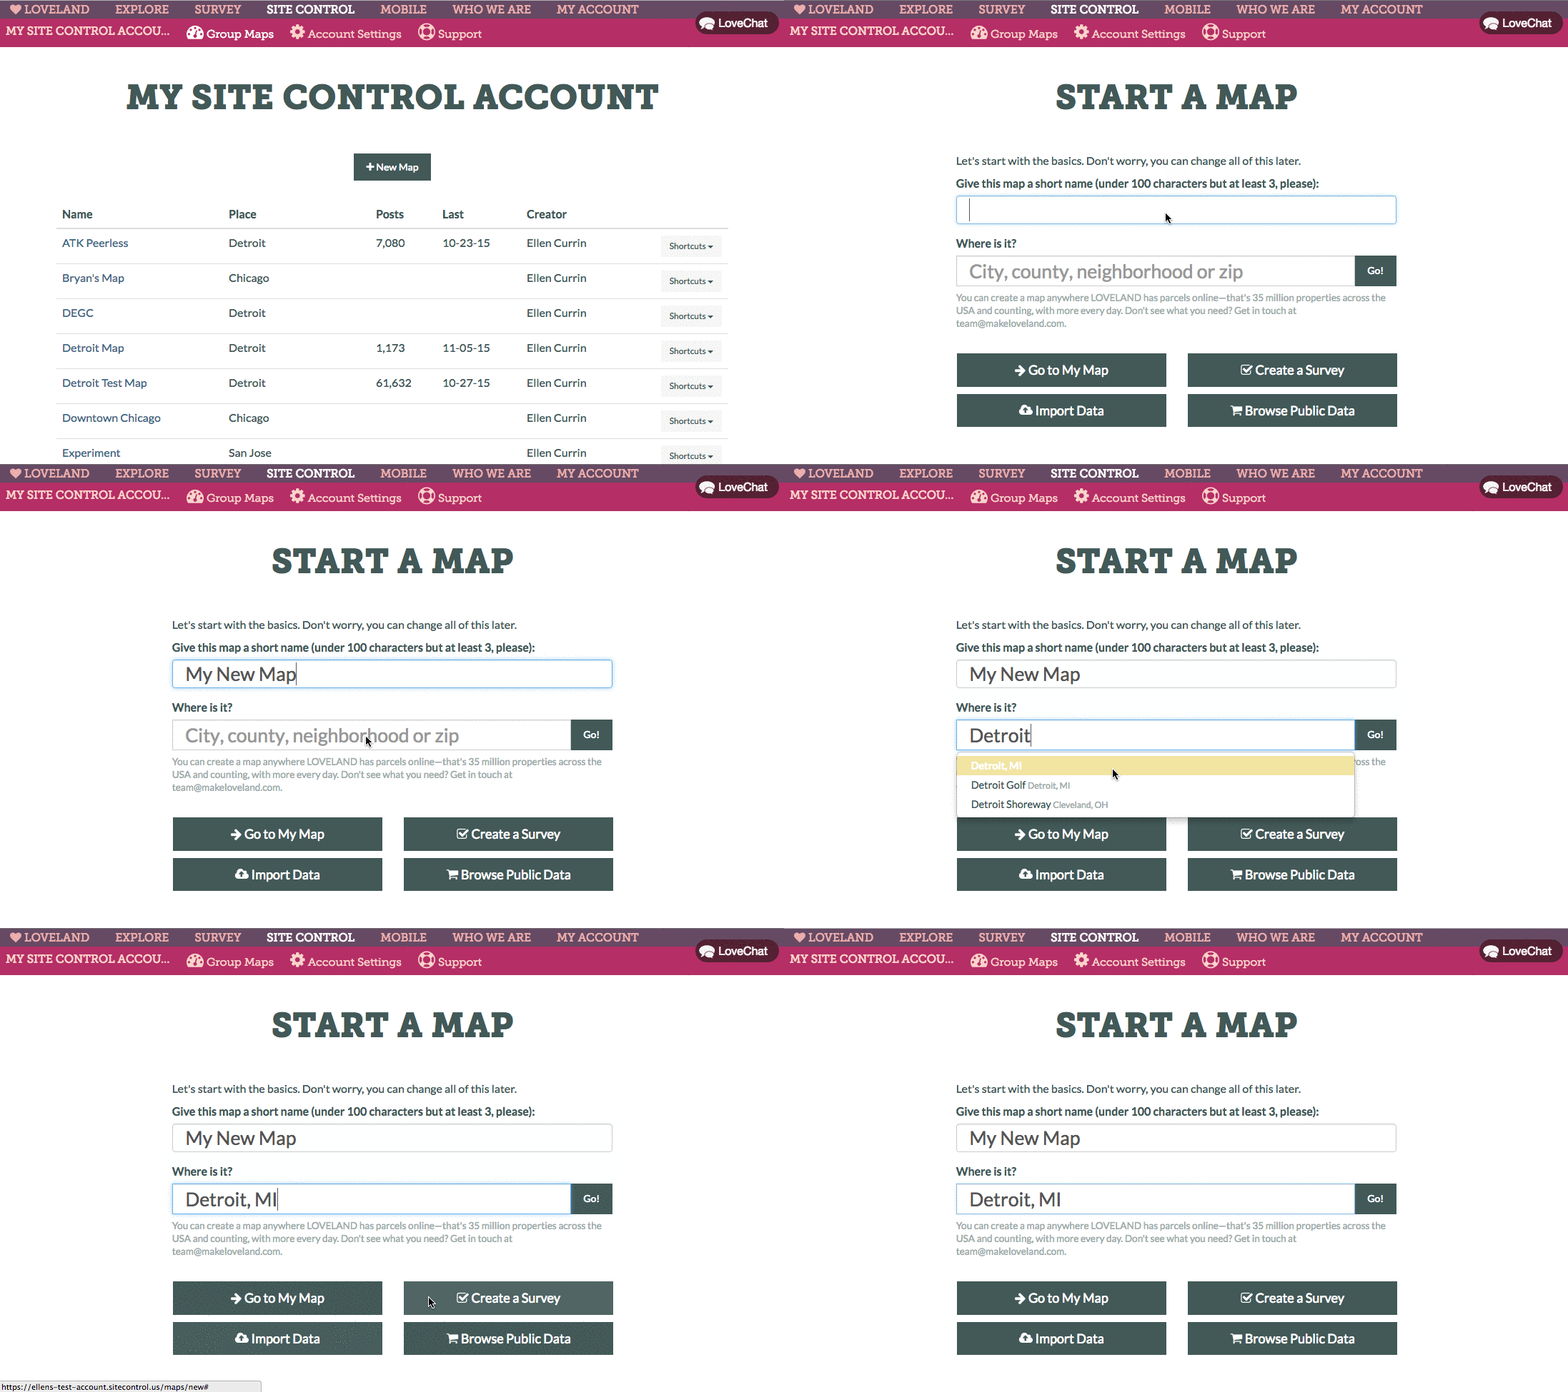
When you log into your Site Control account, you should see the name of your group at the top of the page, and any previous maps you’ve made listed below.
To create a new map, simply click the “+ New Map” button just below your group name.
Then, give your new map a name and specify a location for the map. The location can be a city, neighborhood, or zip code. As you type your map’s location, options will appear in a drop-down below the text bar. Select one of those options to be sure your location is in the correct format. If no options appear under the text bar, check your spelling and make sure that the area you chose is part of Loveland’s national cadastre (makeloveland.com/us).
Once you specify a name and location for your map, you have several options:
- Click “Go to My Map” to view the map you just created and to experiment with features like drawing a focus area.
- Click “Create a Survey” to go directly to Site Control’s survey builder to create a custom survey.
- Click “Import Data” to import your own data or to connect data from an open data portal.
- Click “Browse Public Data” to explore Site Control datasets that have been made public by other users.

